In “Mastering the Basics of Leather Crafting,” we embark on an exciting journey into the world of leatherwork, where creativity meets craftsmanship. We’ll explore the essential tools, techniques, and tips needed to get started in this timeless art. Together, we’ll learn how to select the perfect leather, achieve precise cuts, and master the fundamental stitching methods that form the foundation of every leather project. With our collective enthusiasm and shared passion, we’ll transform raw materials into beautiful, handcrafted creations that reflect our skill and dedication.
Have you ever wondered how your favorite leather goods come to life? Leather crafting is a timeless art that allows us to create everything from stylish accessories to practical everyday items. Whether it’s a classic leather wallet, an elegantly stitched handbag, or a durable belt, the craftsmanship involved in making these items is truly fascinating. In this guide, we’ll walk you through the essentials of leather crafting, making it easy for you to dive into this rewarding hobby.

What is Leather Crafting?
Leather crafting, or leatherworking, is the practice of making items from leather. This craft has been around for centuries and has evolved into a sophisticated art form. Leather crafting involves various skills, such as cutting, stitching, dyeing, and tooling.
History of Leather Crafting
Leather crafting dates back to ancient civilizations. Early humans used leather for clothing, shelter, and tools. As societies evolved, leatherwork became more refined, leading to the creation of beautifully crafted items for both practical and decorative purposes.
Why Choose Leather Crafting?
Leather crafting is a fulfilling hobby that allows us to create custom, high-quality items. It can also be a profitable venture, as handmade leather goods are highly valued for their durability and aesthetic appeal. Plus, working with leather provides a sense of satisfaction from transforming raw materials into something useful and beautiful.
Getting Started with Leather Crafting
Before we dive into the techniques and projects, let’s gather the basic tools and materials you’ll need for leather crafting.
Essential Tools
Knowing our tools is the first step to mastering any craft. Here’s a list of essential tools every leather crafter should have:
| Tool | Description |
|---|---|
| Utility Knife | For cutting leather with precision. |
| Cutting Mat | Protects surfaces and extends the life of blades. |
| Ruler | A steel ruler helps in making straight cuts and measurements. |
| Awl | Used for marking patterns and making holes. |
| Needles | Special leather needles are thicker and designed to work with tough material. |
| Thread | Waxed thread is strong and works best for leather projects. |
| Stitching Pony | Holds leather pieces in place while stitching. |
| Edge Beveler | Rounds off the sharp edges of cut leather. |
| Burnishing Tool | Used to smooth and finish the edges. |
Types of Leather
Different projects require different types of leather. Here are the main categories:
| Type of Leather | Characteristics | Common Uses |
|---|---|---|
| Full-Grain | Best quality, retains the natural grain | Bags, belts, wallets |
| Top-Grain | Second highest quality, sanded to remove imperfections | Upholstery, high-end items |
| Genuine Leather | Lower layers of hide, less durable | Budget-friendly goods |
| Suede | Created from the underside of the hide, soft and pliable | Clothing, shoes, accessories |
| Nubuck | Top-grain leather that has been sanded to give a soft, velvety feel | Shoes, jackets, upholstery |
| Faux Leather | Made from synthetic materials, budget-friendly, and animal-friendly | Fashion accessories, furniture |
Preparing Your Leather
Before we start crafting, it’s important to prepare our leather properly. Conditioning, cutting, and creating patterns are the essential steps in this process.
Conditioning Leather
Leather should always be conditioned before use to keep it supple and avoid cracks:
- Clean: Wipe the leather with a damp cloth to remove any dirt.
- Apply Conditioner: Using a sponge, apply a leather conditioner evenly across the surface.
- Let it Dry: Allow the conditioner to soak in for at least an hour.
Cutting Leather
Cutting leather is a fundamental skill in crafting. Here’s how to do it properly:
- Measure and Mark: Use a ruler and awl to mark your pattern on the leather.
- Use a Sharp Knife: A sharp utility knife ensures clean cuts without tearing the leather.
- Cut on a Mat: Ensure you’re cutting on a self-healing cutting mat to protect your surfaces and blades.
Making Patterns
Creating a pattern is like drafting a blueprint for your leather item. It helps ensure accuracy and consistency:
- Design on Paper: Sketch your design on paper, including all relevant measurements.
- Transfer to Leather: Use an awl to trace the pattern onto your leather piece.
- Cut the Pattern: Carefully cut along the traced lines.
Basic Leather Crafting Techniques
Understanding and mastering basic techniques can significantly impact the quality of our finished products.
Stitching Leather
Stitching is one of the most important techniques in leather crafting. A well-stitched seam is strong and adds to the aesthetic appeal of the crafted item.
Saddle Stitching
The saddle stitch is a popular technique because it is strong and visually appealing:
- Prepare the Leather: Use your awl to make evenly spaced holes along the seam.
- Thread the Needles: Cut a length of thread roughly four times the length of the seam, and thread a needle on each end.
- Stitch: Pass one needle through the first hole from one direction and the other needle through the same hole from the opposite direction. Repeat this process, pulling the thread tight after each stitch.
Quick Stitching Tips
- Use Waxed Thread: It adds strength and prevents knots.
- Consistent Tension: Keep the thread tension even to avoid puckering.
- Stitching Pony: It helps to hold the leather in place, leaving your hands free to stitch.
Dying and Stamping Leather
Adding colors and patterns can give a unique look to your leather projects.
Dying Leather
Dyeing allows us to add beautiful colors to our leather projects:
- Prepare the Leather: Clean and condition the leather before dyeing.
- Apply Dye: Using a sponge or brush, apply the dye in even coats. Multiple layers may be required to achieve the desired color.
- Finish: Once dry, apply a finish to protect the color and add shine.
Stamping Leather
Stamping adds intricate designs to our leather items:
- Damp the Leather: Lightly moisten the leather with water.
- Position the Stamp: Place the stamp on the leather and ensure it’s properly aligned.
- Hammer: Use a mallet to tap the stamp firmly and evenly into the leather.
Edge Finishing
Finishing the edges of our leather projects adds a professional touch.
Beveling
- Tool Use: Use an edge beveler to shave off the sharper edge of your leather piece.
- Even Strokes: Work with even, steady strokes to maintain a smooth edge.
Burnishing
- Dampen Edges: Slightly wet the edges with water or a burnishing solution.
- Rub: Use a burnishing tool to rub the edges until they are slick and smooth.
Common Leather Craft Projects
Now that we’ve covered the basics, it’s time to put our skills to the test with some common leather crafting projects. These projects are excellent for beginners and can make great gifts or personal items.
Leather Wallet
A leather wallet is a practical project that introduces essential leather crafting techniques.
Materials Needed
- Veg-tan leather
- Waxed thread
- Needles
- Pattern template
Steps
- Cut the Leather: Use the pattern to cut out all the wallet pieces.
- Punch Holes: Use an awl to punch stitching holes around the edges.
- Stitch: Use a saddle stitch to sew the pieces together.
- Finish Edges: Bevel and burnish the edges for a professional finish.
Leather Belt
Creating a custom leather belt is a project that teaches measurement, cutting, and finishing techniques.
Materials Needed
- Full-grain leather strip
- Buckle
- Rivets
- Edge beveller and burnisher
Steps
- Measure and Cut: Measure your waist and cut the leather strip to the desired length.
- Attach Buckle: Fold the end of the leather over the buckle and secure with rivets.
- Punch Holes: Use an awl or hole punch to create belt holes.
- Finish Edges: Bevel and burnish the edges.
Leather Keychain
A leather keychain is a quick project that’s perfect for practicing basic techniques like cutting, stamping, and finishing.
Materials Needed
- Leather scraps
- Keyring
- Stamps or dye
Steps
- Cut Leather: Cut a small strip of leather.
- Decorate: Use stamps or dye to add designs.
- Attach Keyring: Fold the leather strip over the keyring and secure with a rivet.

Troubleshooting Common Issues
As with any craft, we might encounter a few hiccups along the way. Here are some common issues and how to address them.
Uneven Cuts
Uneven cuts are a frequent issue for beginners. To avoid this, always use a sharp utility knife and a ruler. Ensure you’re cutting on a stable surface and take your time.
Thread Breakage
Thread breakage can be frustrating. Using waxed thread and ensuring your needles are correctly sized for your project can help reduce this problem. Also, avoid pulling the thread too tightly.
Leather Cracking
If your leather is cracking, it’s likely too dry. Always condition your leather properly before use. Applying a leather conditioner and allowing it to soak in can prevent cracking.
Advanced Techniques
Once we’re comfortable with the basics, we can explore advanced techniques to create even more sophisticated leather items.
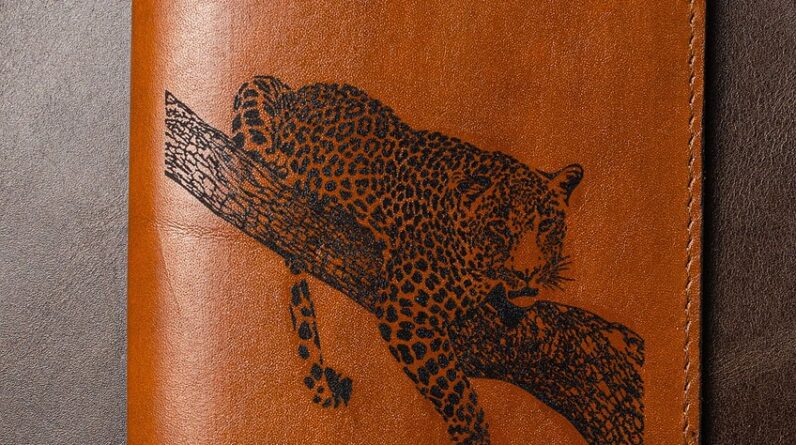
Leather Carving
Leather carving is an advanced technique used to create detailed designs. It involves cutting into the leather surface to create patterns and adding texture.
Tools Required
- Swivel knife
- Stamps
- Mallet
Process
- Prepare Leather: Moisten the leather to make it pliable.
- Sketch Design: Lightly sketch your design on the leather.
- Carve: Use a swivel knife to cut along your design lines.
- Add Texture: Use stamps and a mallet to add texture and detail.
Hand Painting Leather
Custom painting adds a unique touch to leather items. It’s an expressive technique that allows for endless creativity.
Materials Needed
- Leather dye or acrylic paint
- Brushes
- Paint sealant
Steps
- Prepare Leather: Ensure the leather is clean and dry.
- Sketch Design: Lightly sketch your design on the leather surface.
- Paint: Use leather dye or acrylic paint to fill in your design.
- Seal: After the paint dries, apply a sealant to protect your work.
Creating Custom Patterns
Designing custom patterns allows us to create bespoke items tailored to our specific needs or tastes.
Tools Needed
- Graph paper
- Measuring tools
- Awl
Steps
- Conceptualize: Think about the item you want to create and its dimensions.
- Draw: Use graph paper to draw your pattern, ensuring all parts fit together correctly.
- Transfer: Use an awl to transfer the pattern onto your leather.
- Cut and Assemble: Follow your pattern to cut and assemble your item.

Maintaining and Caring for Leather Products
Proper care ensures our leather projects last a lifetime. Here’s how we can maintain and care for our leather items.
Cleaning Leather
Regular cleaning helps maintain the appearance and longevity of leather.
- Wipe Down: Use a damp cloth to wipe off any surface dust and dirt.
- Mild Soap: For deeper cleaning, use a mild soap and water solution, but avoid soaking the leather.
- Dry Properly: Allow the leather to air dry naturally.
Conditioning Leather
Leather can dry out over time. Conditioning helps keep it supple and prevents cracking.
- Choose a Conditioner: Use a conditioner specifically designed for leather.
- Apply Evenly: Apply the conditioner evenly using a soft, clean cloth.
- Allow to Absorb: Let the leather absorb the conditioner completely before buffing to a shine.
Storing Leather Products
Proper storage prevents damage and maintains the shape of leather items.
- Avoid Direct Sunlight: Store leather away from direct sunlight to prevent fading.
- Cool, Dry Place: Store items in a cool, dry area to avoid mold and mildew.
- Use Dust Bags: Fabric dust bags can protect items from dust and scratches.
Conclusion
Leather crafting is a rewarding hobby that allows us to create beautiful, durable items with our own hands. From understanding the essential tools and materials to mastering basic and advanced techniques, we’ve covered all the foundational knowledge needed to start this craft. Whether we aim to make practical everyday items or intricate custom designs, the skills we develop in leather crafting are bound by tradition and enriched by our creativity. So grab your tools, choose your leather, and let’s start crafting!