Creating handmade cards is a wonderful way for us to express our creativity and show our loved ones how much we care. In “Handmade Cards for Every Occasion,” we’ll explore the joy of crafting personalized cards that add a special touch to any event, be it birthdays, anniversaries, or holidays. We’ll discover simple techniques, share inspiring ideas, and see how our unique designs can bring smiles to those who receive our heartfelt creations. Whether we’re seasoned crafters or just starting out, there’s something magical about putting our hearts into making something truly one-of-a-kind.
Have you ever received a handmade card that made you smile from ear to ear? We’ve all experienced that warm feeling when someone takes the time to craft something just for us. Handmade cards have a unique way of conveying love, care, and thoughtfulness. In a world where digital communication is the norm, investing time and effort into a handmade card can make any occasion extra special.
Why Handmade Cards Matter
Handmade cards are more than just paper and glue. We pour our time, love, and creativity into each piece, making it a one-of-a-kind gift. Whether it’s a birthday, a holiday, or just a random day to show someone you care, handmade cards offer a personal touch that store-bought cards simply cannot match.
Personal Touch
When we make cards by hand, we add unique elements that reflect our personality and the recipient’s likes. It’s more than just handwriting; it’s selecting colors, papers, and embellishments that mean something to us and the recipient. Imagine the sparkle in someone’s eyes when they recognize these personalized touches.
Creative Expression
Crafting cards lets us express our creativity. We can experiment with different techniques and materials. Paper crafting, stamping, drawing, and even digital elements can all come together in beautiful harmony. The act of making the card becomes a creative outlet, and the final product serves as an art piece for someone to cherish.
Environmental Impact
By creating cards by hand, we have the opportunity to use sustainable materials. Many crafters opt for recycled paper, eco-friendly ink, and reusable embellishments. This helps reduce our environmental footprint compared to buying mass-produced cards, which often come with excess packaging and non-recyclable materials.
Tools and Materials Needed
Before we dive into the process, let’s discuss the essential tools and materials. Having the right supplies will make your card-making venture more enjoyable and efficient.
Basic Tools
The following tools will cover most of your card-making needs:
| Tool | Purpose |
|---|---|
| Scissors | Cutting paper and other materials |
| Glue | Adhering materials together |
| Cutting Mat | Protecting surfaces and making precise cuts |
| Craft Knife | Making detailed cuts |
| Ruler | Measuring and ensuring straight lines |
| Bone Folder | Creating crisp folds |
| Stamps and Ink | Adding decorative designs and text |
Paper Types
Selecting the right paper is crucial for card durability and aesthetic appeal:
| Paper Type | Use Case |
|---|---|
| Cardstock | Basis for most cards |
| Patterned Paper | Adding decorative elements |
| Vellum | Creating overlay effects |
| Tissue Paper | Adding texture and layering |
| Recycled Paper | Eco-friendly options |
Embellishments
Embellishments can take your cards from simple to extraordinary.
| Embellishment | Effect |
|---|---|
| Stickers | Easy decorative elements |
| Ribbons | Adding a luxurious touch |
| Glitter | Making cards sparkle |
| Buttons | Adding dimension and interest |
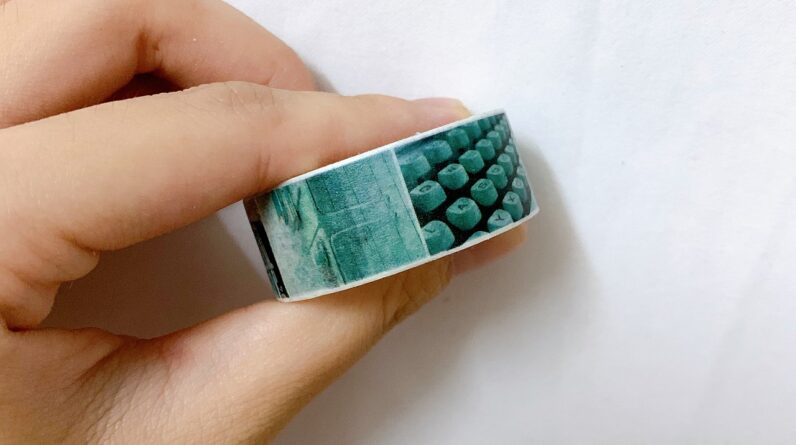
| Washi Tape | Quick patterns and borders |
| Die Cuts | Pre-cut shapes for easy decoration |
Techniques for Creating Handmade Cards
Once we have our tools and materials, we can explore various techniques to create stunning handmade cards.
Stamping
Stamping involves using rubber or clear stamps with ink to create designs. Mastering stamping can allow us to produce intricate designs without much effort. By experimenting with different ink colors and embossing powders, we can achieve various effects.
Embossing
There are two types of embossing: dry embossing and heat embossing. Dry embossing uses a stylus and templates to create raised designs on paper. Heat embossing involves stamping a design with special ink and then applying embossing powder, which is then heated to create a raised, shiny effect.
Paper Piecing
Paper piecing involves cutting different shapes or patterns and piecing them together to form a picture or design. This is somewhat like creating a puzzle and can be quite intricate, resulting in a stunning visual effect.
Watercolor Painting
If we enjoy painting, using watercolors can provide a beautiful, soft look for our cards. We can paint entire scenes, create colorful backgrounds, or use watercolors to add subtle details.
Quilling
Quilling involves rolling strips of paper into various shapes and then gluing them together to create intricate designs. This technique can be time-consuming, but the results are often breathtaking.

Celebrating Different Occasions
Handmade cards are perfect for any occasion. Let’s explore how we can tailor our designs to fit specific celebrations.
Birthdays
Birthdays are one of the most popular occasions for handmade cards. Personalizing a birthday card based on the recipient’s interests can make the day even more special. Consider adding elements like their favorite colors, hobbies, or even an inside joke.
Holidays
From Christmas to Halloween, holidays provide endless inspiration for card making. Incorporate festive elements like holiday-themed stamps, embossed designs, or seasonal colors. Handmade holiday cards become keepsakes that recipients look forward to every year.
Weddings and Anniversaries
Wedding and anniversary cards often call for a touch of elegance. Think about using lace, metallic inks, and romantic colors. Handwritten messages and calligraphy can add a sophisticated touch.
Thank You Cards
A handmade thank you card can show genuine appreciation. Simple designs with heartfelt messages can go a long way. Consider minimalist designs with clean lines and soft colors to convey sincerity.
Sympathy Cards
Sympathy cards require a delicate approach. Gentle colors and simple designs are best. Adding a personal, heartfelt message can offer comfort during difficult times.
Just Because
Sometimes, the best cards are those given for no particular reason. A “just because” card can brighten someone’s day unexpectedly. These cards give us the freedom to experiment with fun and quirky designs.
Step-by-Step Guide to Making a Handmade Card
Let’s walk through the process of creating a simple, yet beautiful, birthday card.
Step 1: Gather Supplies
For this project, we’ll need:
- Cardstock
- Stamps and ink pad
- Patterned paper
- Glue
- Scissors
- Embellishments (e.g., stickers, ribbons)
Step 2: Fold the Cardstock
Start by folding an 8.5×11 inch piece of cardstock in half to create a standard-sized card. Use a bone folder to make a crisp, clean fold.
Step 3: Design the Front
Cut a piece of patterned paper slightly smaller than the front of the card. Glue it onto the card to create a background. Next, choose a stamp with a birthday sentiment. Stamp it on a piece of smaller cardstock and adhere it to the front of the card.
Step 4: Add Embellishments
Select stickers or other embellishments that fit the birthday theme. Arrange them around the stamped sentiment. Try not to overcrowd; sometimes less is more.
Step 5: Write Inside the Card
Write a heartfelt message inside the card. This is your chance to make the recipient feel special. Personalize the message to make it more meaningful.
Step 6: Final Touches
Inspect your card for any finishing touches. If necessary, add any final embellishments or make adjustments. And there you have it—a beautiful handmade birthday card!
Advanced Tips and Tricks
For those of us looking to take our card-making skills to the next level, here are a few advanced tips and tricks.
Layering Techniques
Layering different papers, textures, and embellishments can add depth and dimension to your cards. Experiment with different combinations to see what creates the best effect.
Interactive Elements
Incorporating pop-ups, sliders, and other interactive elements can make your cards more dynamic. These elements add a touch of surprise and delight for the recipient.
Digital Designs
Combine traditional handmade elements with digital designs. Use graphic design software to create unique elements, print them out, and integrate them into your handmade cards.
Calligraphy
Improve your handwriting with calligraphy lessons. Beautiful handwriting can elevate a card’s design and add a personal, artistic touch.
Professional Finishes
For a polished look, consider investing in a die-cutting machine, embossing folders, and other advanced tools. These can help you achieve professional-level aesthetics.
Troubleshooting Common Issues
Even experienced crafters encounter problems. Here’s how to troubleshoot some common issues.
Uneven Cuts
Ensure you’re using a sharp craft knife and a ruler for straight lines. Cutting mats can also help in making precise cuts.
Stamping Errors
If your stamp doesn’t print cleanly, try using a stamping platform, which helps ensure even pressure. Practice on scrap paper before stamping on your final piece.
Glue Smudges
Use a precision applicator for your glue to avoid excess smudging. If smudges occur, they can often be camouflaged with embellishments or by incorporating them into the design.
Warped Paper
Excessive moisture from glue or watercolor can warp paper. Use a minimal amount of liquid glue and ensure your watercolors are not too wet. Placing the card under a heavy book can help flatten it out if warping occurs.
Creating a Handmade Card-Making Kit
Having a dedicated kit can streamline your process and ensure you always have the essentials on hand. Here’s what to include:
Essential Items
| Item | Purpose |
|---|---|
| Cardstock | Base for all cards |
| Patterned Paper | Decorative backgrounds |
| Stamps & Ink | Designs and messages |
| Glue | Adhering materials |
| Scissors | Cutting materials |
| Craft Knife | Making precise cuts |
| Cutting Mat | Protecting surfaces |
| Embellishments | Adding special touches |
Nice-to-Have Items
| Item | Purpose |
|---|---|
| Die-Cutting Machine | Creating intricate shapes and designs |
| Embossing Folders | Adding texture to paper |
| Heat Gun | For heat embossing techniques |
| Bone Folder | Making crisp, clean folds |
| Ruler | Ensuring straight lines |
Selling Handmade Cards
If you find joy in making these cards, why not share that joy with others? Selling handmade cards can be a fulfilling hobby or even a small business.
Pricing Your Cards
Consider the cost of materials and the time spent creating each card. Research similar products to ensure your pricing is competitive yet fair.
Finding a Market
Sell online through websites like Etsy, or at local craft fairs and markets. Social media can also be a great way to showcase your work and reach potential customers.
Branding
Develop a unique branding style that reflects your artwork. Consistent branding will make your cards more recognizable and professional.
Customer Service
Excellent customer service will keep customers coming back. Always package your cards carefully to ensure they arrive in perfect condition.
Conclusion
Creating handmade cards is a wonderful way to express our creativity and show people we care. Whether it’s for a birthday, holiday, or just because, a handmade card adds a personal touch that no store-bought card can match. By using different techniques, tools, and materials, we can create beautiful, unique cards for every occasion. So let’s gather our supplies and start crafting!
We hope this guide inspires you to make your own handmade cards and spread a little more love and joy. Happy crafting!


