Welcome to “The Basics of Sewing: From Stitches to Seams”! In this article, we explore the fundamental steps of sewing, ranging from the simplest stitches to the more complex art of creating perfect seams. By the end, we’ll have a solid grasp of essential techniques and be ready to embark on our own sewing projects with confidence and creativity. Let’s dive into the fascinating world of sewing together and uncover just how rewarding and enjoyable this craft can be.
Have you ever picked up a sewing needle or a piece of fabric and wondered how it all comes together to create beautiful garments or intricate crafts? If you’re nodding your head, then welcome! Let’s dive into the wonderful world of sewing. Together, we’ll make the seemingly complicated task of sewing much more approachable. By the end of this article, we’ll have walked through all the essentials—from basic stitches to the importance of seams. So grab your needle and thread, and let’s get started on this sewing journey!
What is Sewing?
Sewing is the craft of fastening or attaching objects using stitches made with a needle and thread. It’s one of the oldest crafts and dates back to the Paleolithic era. But don’t let this ancient origin fool you—sewing has evolved and continues to be relevant today, whether you are fixing a tear in your pants or creating a unique fashion piece from scratch.
Hand Sewing vs. Machine Sewing
There are two primary methods of sewing: hand sewing and machine sewing. While both serve the same purpose—joining pieces of fabric—the tools and techniques differ.
Hand Sewing involves using a needle and thread to stitch fabric together manually. It’s often used for delicate fabrics, detailed work, or when a sewing machine is not available. While it can be time-consuming, the control and precision offered by hand sewing can’t be beaten.
Machine Sewing uses a sewing machine to automate the process. This method is quicker and is ideal for larger projects, such as garments or quilts. Though it might seem intimidating to beginners, modern machines come with user-friendly features that make learning easier.
| Aspect | Hand Sewing | Machine Sewing |
|---|---|---|
| Speed | Slower | Faster |
| Precision | High | Moderate to High |
| Suitable for | Small, detailed work | Large projects, durable seams |
| Learning Curve | Moderate | Varies (initially steep) |
| Portability | High | Low |
Essential Sewing Tools
Before we start sewing, we need the right tools. Having a well-stocked sewing kit makes the process smoother and more enjoyable.
Basic Sewing Kit
Let’s take a look at the essentials you’ll need:
- Needles: Different types for various fabrics and purposes. Universal needles are a great starting point.
- Thread: Polyester or cotton thread in basic colors such as black, white, and neutral shades.
- Fabric Scissors: Dedicated scissors to cut fabric easily.
- Pins and Pincushion: Used to hold fabric pieces together before stitching.
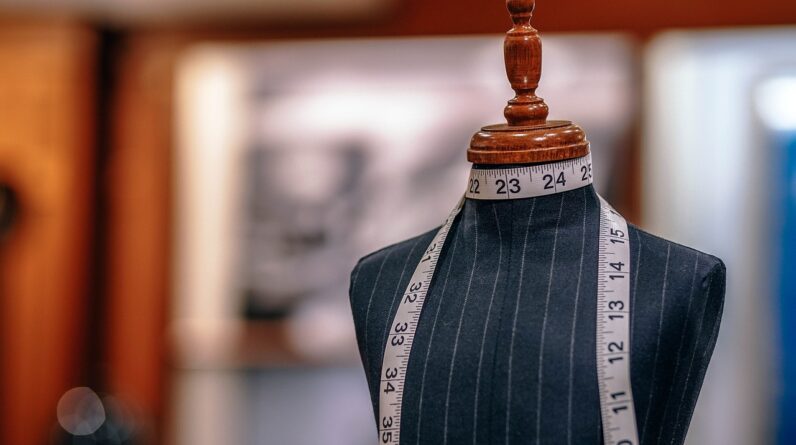
- Tape Measure: To ensure accurate measurements.
- Seam Ripper: Essential for correcting mistakes.
- Tailor’s Chalk or Fabric Marking Pens: For marking fabric.
- Fabric: A few types to practice with, like cotton or muslin.
- Iron: For pressing seams and fabric.
Optional Tools
These aren’t necessary for beginners but can make sewing more efficient and enjoyable:
- Rotary Cutter and Cutting Mat: For precise cuts on fabric.
- Thread Snips: Small and handy for cutting thread.
- Thimble: To protect your finger when hand sewing.
- Pressing Ham: Useful for pressing curved seams.

Understanding Fabrics
Choosing the right fabric is crucial for any sewing project. Fabrics can be broadly categorized into two types: woven and knit.
Woven Fabrics
Woven fabrics are produced by weaving threads over and under each other in a crisscross pattern. They are generally more stable and hold their shape better than knits, making them ideal for beginners.
Common types of woven fabrics include:
- Cotton: Ideal for most projects, especially for beginners.
- Linen: Breathable and suitable for summer clothing.
- Denim: Durable and ideal for jeans and jackets.
- Silk: Luxurious but slippery, requiring more advanced sewing skills.
Knit Fabrics
Knit fabrics are made by interlooping yarns. They are stretchy and often used for garments that require a certain amount of give, like t-shirts or leggings.
Common types of knit fabrics include:
- Jersey: Soft and stretchy, perfect for casual wear.
- Interlock: A bit thicker than jersey and great for comfortable clothes.
- Rib Knit: Known for its elasticity, usually seen on cuffs and collars.
Basic Stitches
Understanding some basic stitches will arm us with the tools to tackle a wide range of projects. Here are a few foundational stitches for both hand sewing and machine sewing.
Hand Stitches
-
Running Stitch: This is the most basic stitch. Simply weave the needle in and out of the fabric in a straight line. It’s used for gathering and tacking.
-
Backstitch: Stronger than a running stitch, the backstitch locks the stitches in place. It’s excellent for seams that need to withstand some wear and tear.
-
Whip Stitch: Often used to finish edges or close up small openings, like the final stitch on a stuffed toy.
-
Blanket Stitch: This stitch is typically used for edging and can be both functional and decorative.
Machine Stitches
-
Straight Stitch: The most common stitch used for seams and topstitching. Adjust the length based on your fabric type.
-
Zigzag Stitch: Great for finishing raw edges, sewing stretch fabrics, and creating buttonholes.
-
Overlock Stitch: This stitch combines the functions of seaming and finishing edges, making it perfect for garments.
-
Buttonhole Stitch: Used for creating neat, reinforced holes for buttons.
| Stitch | Hand Sewing | Machine Sewing |
|---|---|---|
| Most Basic | Running Stitch | Straight Stitch |
| Strong and Durable | Backstitch | Zigzag Stitch |
| Edge Finishing | Whip Stitch | Overlock Stitch |
| Decorative | Blanket Stitch | Buttonhole Stitch |
Tips for Perfect Stitches
- Thread Length: Don’t use an overly long piece of thread when hand sewing; it’s prone to tangling.
- Practice: Like any skill, the more you practice, the better your stitches will become.
- Tension: Correct tension is crucial in machine sewing to avoid loose or puckered stitches.
- Needle Size: Match the needle size to your fabric and thread for cleaner stitches.

Mastering Seams
Seams are the backbone of sewing. They join two or more pieces of fabric together and can vary widely based on the tool and technique used.
Types of Seams
- Plain Seam: The most basic seam, created by placing two pieces of fabric right sides together and stitching along the edge.
- French Seam: Encases the raw edges, making it perfect for delicate fabrics that fray easily.
- Flat-Felled Seam: Strong and durable, used in garments like jeans and sportswear.
- Double-Stitched Seam: Two parallel lines of stitches for extra strength, often used in areas that experience stress.
Steps to Sew a Plain Seam
- Prepare Fabric: Place the fabrics right sides together.
- Pin Fabric: Pin along the edge to hold the pieces together.
- Sew: Use a straight stitch to sew along the edge.
- Press: Iron the seam open for a flat finish.
How to Sew a French Seam
- First Seam: Place the fabrics wrong sides together and sew a narrow seam.
- Trim: Cut the seam allowance down to about 1/8 inch.
- Turn Fabric: Flip the fabric so the right sides are together.
- Second Seam: Sew along the edge, encasing the trimmed seam inside.
How to Sew a Flat-Felled Seam
- First Seam: Place the fabrics right sides together and sew the initial seam.
- Trim and Fold: Trim one seam allowance down to 1/4 inch and fold the other over it.
- Second Seam: Topstitch the folded seam down to encase the raw edges.
Finishing Techniques
Once the stitching is done, we often need to finish edges to prevent fraying and to give the project a professional look.
Hemming
Hemming is the process of folding the edge of fabric and sewing it to create a clean finish. It’s essential for garment hemlines, sleeves, and edges.
- Double Fold Hem: Fold the raw edge up twice and sew.
- Single Fold Hem: Fold the edge up once and sew, often used on fabrics that don’t fray.
- Blind Hem: A specialized stitch that’s almost invisible; perfect for professional garment hems.
Edge Finishing
- Zigzag or Overlock Stitch: Prevents fraying on raw edges.
- Binding: Encases raw edges with a strip of fabric.
- Pinking Shears: Scissors with a serrated edge to cut a decorative, anti-fray edge.

Sewing Patterns
Patterns are essential for sewing garments. They serve as templates to guide cutting and sewing.
Types of Patterns
- Commercial Patterns: Available in stores, they come with instructions and multiple sizes.
- PDF Patterns: Purchased and printed at home.
- Self-Drafted Patterns: Created by measuring the body and drawing the pattern from scratch.
How to Read a Pattern
- Pattern Envelope: Contains crucial information like size, suggested fabrics, and required materials.
- Pattern Pieces: The paper templates you’ll cut out and use.
- Sewing Instructions: Step-by-step directions for assembling the garment.
Importance of Pattern Sizing
Pattern sizes often differ from retail clothing sizes. Always measure yourself and compare your measurements to the pattern’s size chart to choose the correct size. Making a muslin (a test garment) is highly recommended, especially for fitted garments.
Troubleshooting Common Issues
Even experienced sewers encounter problems. Here are solutions to some common issues:
Uneven Stitches
- Adjust Tension: Incorrect tension can cause uneven stitches.
- Change Needle: A dull or incorrect needle can contribute to this problem.
- Practice: Improved control comes with time and practice.
Fabric Puckering
- Check Tension: Both fabric tension and thread tension might require adjustment.
- Stabilize Fabric: Use stabilizers for thin or stretchy fabrics.
Thread Breaking
- Quality Thread: Use high-quality thread.
- Tension: Check that the tension isn’t too high.
- Needle: Ensure the needle is not dull or bent.
Machine Jamming
- Clean Machine: Regular maintenance is key.
- Correct Threading: Follow the machine’s threading mechanism accurately.
Safety Tips
Sewing is generally safe, but it’s important to follow some basic safety guidelines to avoid accidents.
- Needles and Pins: Keep them organized to prevent stepping on or losing them.
- Scissors: Only use them for fabric to keep them sharp and efficient.
- Iron Safety: Always turn the iron off when not in use and be mindful of hot surfaces.
- Electrical Safety: Ensure your sewing machine is in good working order and properly plugged in.
Getting Started with Your First Project
Feeling ready to tackle your first project? Start simple to build confidence and skills.
Easy Projects for Beginners
- Tote Bag: A straightforward project that introduces basic seams and finishing techniques.
- Pillowcase: Learn to sew straight lines and practice hemming.
- Scrunchie: A small project that’s great for learning how to sew elastic.
Tips for Success
- Choose Simple Fabrics: Start with stable fabrics like cotton.
- Follow Instructions: Stick to the pattern or project guidelines.
- Take Your Time: Rushing often leads to mistakes.
- Ask for Help: Join a sewing group or online forum.
Conclusion
Sewing is a rewarding and versatile craft that opens up a world of possibilities. By mastering the basics from stitches to seams, you’ll be well on your way to creating beautiful, handmade pieces. Remember, the key to successful sewing is practice, patience, and a willingness to learn from mistakes. So let’s embrace our creativity and stitch something wonderful together!