Hey there, creative friends! In our article, “DIY Personalized Mugs: Creative Ideas,” we share some delightful and easy-to-follow tips for crafting your very own custom mugs. Whether you’re looking to make a heartfelt gift or simply want to add a personal touch to your morning coffee, we’ve got an array of ideas that you can try right at home. From simple designs using permanent markers to more intricate patterns with paint and stencils, we’ll guide you through each step. Let’s get ready to turn our ordinary mugs into unique masterpieces that are truly one-of-a-kind!
Have you ever found yourself wanting to add a personal touch to your daily cup of coffee or tea? We all know how delightful it can be to sip from a mug that feels uniquely ours, especially when it’s something we’ve created ourselves. Personalized mugs aren’t just about making a fashion statement; they’re about bringing a bit more joy and personality into our everyday routines.
In this article, we’re diving deep into the world of DIY personalized mugs. From creative ideas to step-by-step guides, we’ll explore how anyone can transform a plain mug into a piece of art. Whether it’s for ourselves, a loved one, or even for a special event, there’s something inherently satisfying about crafting a mug that speaks to who we are. Let’s get started!
The Joy of Personalized Mugs
There’s something special about drinking from a mug that’s been tailored to our tastes and preferences. It’s not just an addition to our collection, but a reflection of our creativity and individuality. Personalized mugs can evoke memories, celebrate milestones, and make wonderful gifts. They’re versatile, practical, and immensely fun to create!
Benefits of DIY Personalized Mugs
Crafting personalized mugs offers numerous benefits:
- Memorability: Each sip from the mug reminds us of the time and effort put into creating something beautiful.
- Customization: We can design mugs that perfectly match our style or the personality of the person we’re gifting it to.
- Cost-Effectiveness: DIY mugs are often more economical compared to store-bought customized options.
- Creativity Boost: Engaging in DIY projects stimulates our creativity and allows us to unwind.
Materials You’ll Need
Before we can start creating, we’ll need a few basic supplies. Here’s a handy table summarizing the essential materials:
| Material | Purpose |
|---|---|
| Plain Ceramic Mugs | The canvas for our creative designs. |
| Porcelain Paint Pens | For detailed and vivid designs. |
| Acrylic Paints | Provides a broader range of colors and styles. |
| Paint Brushes | Needed if using acrylic paints. |
| Stencils | Helps with creating precise and repeatable patterns. |
| Clear Gloss Spray | To seal and protect the final design. |
| Rubbing Alcohol | Cleanses the mug surface for even application of paints. |
When gathering our materials, we should keep in mind the scope of our projects. Simple designs might require fewer tools, while more complex projects might need all the items listed.
Creative Ideas for Personalized Mugs
The beauty of DIY mugs lies in the endless possibilities for creativity. Whether we’re beginners or seasoned artists, there’s always a new idea to explore.
Hand-Painted Designs
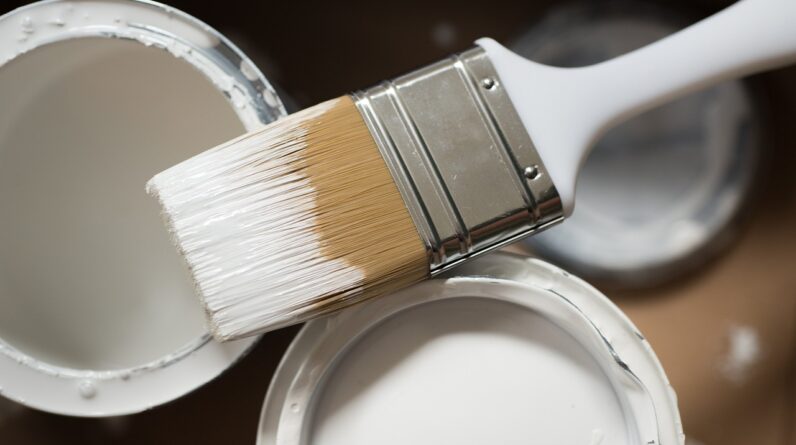
Hand-painted mugs are a timeless classic. With a few porcelain paint pens or acrylic paints, we can create everything from abstract designs to intricate patterns. Here’s a step-by-step guide to get us started:
- Clean the Mug: Use rubbing alcohol to clean the mug, ensuring the surface is free from dirt and oils.
- Plan Your Design: Sketch out the design on paper first. This helps visualize the final product and make adjustments.
- Begin Drawing: Use the porcelain paint pens to outline and fill in your design. Alternatively, use paintbrushes if working with acrylic paints.
- Drying Time: Allow the paint to dry thoroughly, which can take a couple of hours.
- Bake the Mug: Place the mug in a cold oven and set it to 350°F (175°C). Bake for 30 minutes to set the paint. Let the mug cool in the oven before removing.
- Seal the Design: Apply a clear gloss spray to protect the design and make it dishwasher safe.
Inspirational Quotes and Sayings
Adding inspirational quotes or witty sayings can make our mugs more personal and meaningful. Whether we use stencils or freehand, these mugs can offer daily motivation or a good chuckle.
- Select a Quote: Choose a quote that resonates. It could be a favorite line from a book, movie, or something self-authored.
- Preparation: Clean the mug with rubbing alcohol to ensure a smooth surface.
- Stenciling: If using stencils, position them on the mug and secure them firmly. Use the porcelain paint pens to fill in the letters.
- Freehand Writing: For a more organic look, write directly onto the mug with paint pens. Practice on paper first if necessary.
- Seal as Before: Follow the same drying, baking, and sealing steps to preserve the design.
Photo Transfer Methods
Using photo transfer mediums, we can apply actual photographs or intricate images onto our mugs. This method is perfect for personal gifts or capturing cherished memories.
- Choose a Photo: Select a high-resolution image and print it using a laser printer.
- Apply Photo Transfer Medium: Apply a generous amount of photo transfer medium to the printed side of the image.
- Adhere the Image: Press the image onto the mug, smoothing out any air bubbles. Let it dry for at least 24 hours.
- Remove the Paper: Dampen the paper with water and gently rub it off with your fingers, leaving the transferred image behind.
- Seal the Mug: Seal the design with a clear gloss spray for durability.
Seasonal and Holiday Themes
Creating seasonal or holiday-themed mugs can add festive cheer to our homes or provide perfect holiday gifts. Think pumpkins for fall, snowflakes for winter, or hearts for Valentine’s Day.
- Theme Selection: Decide on a theme based on the season or holiday.
- Design Planning: Sketch out seasonal symbols or patterns on paper.
- Painting: Use acrylic paints or porcelain pens to bring the designs to life on the mug.
- Dry, Bake, and Seal: Follow the standard drying, baking, and sealing process.

Advanced Techniques for Personalized Mugs
Once we’ve mastered basic designs, we can explore more advanced techniques to elevate our personalized mugs to the next level.
Marbling Effect
Creating a marbled effect can give our mugs a sophisticated and unique look. This technique involves swirling different colors together to create a marbled pattern.
- Prepare the Materials: Fill a disposable container with warm water. Choose a few complementary colors of nail polish.
- Add Nail Polish: Drip a few drops of each nail polish color onto the water’s surface.
- Create the Marble Effect: Use a toothpick to gently swirl the colors together.
- Dip the Mug: Submerge the mug into the water, allowing the marbled pattern to adhere to the surface.
- Drying and Sealing: Allow the mug to dry completely. Apply a clear gloss spray to protect the design.
Etching Designs
Etching cream can be used for a permanent and elegant look. This technique is ideal for creating subtle, textured designs.
- Stencils: Apply stencils to the mug to outline the design.
- Apply Etching Cream: Carefully spread the etching cream over the exposed areas.
- Wait and Rinse: Allow the cream to sit for the time specified in the instructions (usually a few minutes), then rinse it off with water.
- Remove Stencils: Carefully peel off the stencils to reveal the etched design.
Chalkboard Paint
Using chalkboard paint allows for reusable designs. We can change the artwork or message on our mugs whenever we like.
- Clean the Mug: Clean the surface with rubbing alcohol.
- Tape off Areas: Use painter’s tape to section off the area where you want to apply the chalkboard paint.
- Apply Chalkboard Paint: Paint the designated area with chalkboard paint and let it dry thoroughly.
- Condition the Chalkboard: Rub a piece of chalk over the chalkboard paint once dried and erase it to prime the surface.
- Draw and Redraw: Use chalk or chalk markers to create new designs or messages whenever the mood strikes.
Tips for Successful DIY Personalized Mugs
Creating personalized mugs can be incredibly satisfying, but it’s essential to follow certain tips to ensure the best results.
- Test Materials: Always test your materials on a small section or a separate mug first to ensure they work well together.
- Quality Clean Up: Starting with a clean mug is crucial for the paint to adhere properly.
- Correct Drying Time: Don’t rush the drying process; give ample time for the paint to dry completely.
- Baking Safety: Place the mug in a cold oven to prevent thermal shock, and let it cool down gradually after baking.
- Use Multiple Coats: For a more vibrant design, apply multiple paint coats, letting each coat dry before adding the next.
- Be Patient: Patience is key to producing a high-quality finished product. Rushing can lead to smudges and uneven lines.

Giving Personalized Mugs as Gifts
DIY personalized mugs aren’t just for personal use; they make wonderful and thoughtful gifts. The effort put into creating a customized mug can truly show someone how much we care.
Occasion-Based Mugs
Consider the occasion when creating a personalized mug as a gift:
- Birthdays: Include the person’s name and a design that reflects their hobbies or interests.
- Weddings/Anniversaries: Create matching mugs with the couple’s names and wedding date.
- Holidays: Design mugs that capture the festive spirit, like holly and mistletoe for Christmas.
Gift Presentation
How we present our personalized mugs can also enhance the gifting experience:
- Decorative Boxes: Place the mug in a decorative box with tissue paper for an elegant touch.
- Accompanying Items: Include small items like a packet of gourmet coffee or tea bags to complement the mug.
- Handwritten Note: Add a handwritten note or card to express our sentiments.
Care Instructions for Recipients
To ensure the recipient enjoys their mug for years to come, include care instructions:
- Hand-Wash Recommended: For most custom mugs, hand-washing is recommended to preserve the design.
- Avoid Abrasive Cleaners: Gentle use of non-abrasive sponges and detergents helps keep the design intact.
- Safe Display Locations: Suggest displaying the mug in a safe place to avoid chips or cracks.
Conclusion
Personalizing mugs through DIY methods not only allows us to unleash our creativity but also to craft something meaningful and unique. Whether we choose to adorn our mugs with hand-painted designs, inspirational quotes, or even advanced techniques like marbling and etching, the possibilities are as endless as our imaginations.
We hope this guide has inspired you to pick up a plain mug and transform it into a cherished item. The next time you brew your favorite beverage, imagine sipping from a mug that’s been personalized with your touch. Happy crafting!